Introduction
In part 1 of this series of blog posts that we’ve got going here on building out a network automation CI/CD pipeline, we answered the “motivational” question: “what is CI/CD? what are digital twins in the first place? why use any of this newfangled automation stuff at all?” Is that technically three questions? Sure, but we live life on the edge here! In all seriousness, answering the questions about what exactly we’re doing is important to getting excited about this project and getting all of us on the same page, regardless of how much you knew about network automation coming in, but it doesn’t actually get us any further to…y’know, building a working network automation pipeline!
That DEFINITELY isn’t going to be the case in this part 2 post. In this post, we’ll be setting up our lab environment with all of the software that we’ll need to get rolling with building out the rest of our automation workflows and the lab/production networks we’ll be automating.
Setting Up the VM
The challenge with demonstrating the installation and setup of the various components that we’ll be working with in this blog post is that I already have many of them deployed on my main lab machines. On top of that, I’d love to be able to easily blow away the setup when I’m done writing these blog posts. Fortunately, both of these are very easily solved by doing everything inside of a separate virtual machine!
I’ll be using a VM running Ubuntu Server 24.04.3 LTS. However, pretty much anything Linux-based will do – a VM/physical system running pretty much any Linux distro (whether it has a GUI/desktop environment or not) or even Windows Subsystem for Linux (WSL) for my fellow Windows users out there! Even if you’re on a Mac, this will work just fine! Moreover, we don’t need any crazy multi-VM setup to accomplish any of what we’ll be doing in this blog post. Everything will live in separate containers running on this one host.
Resource-wise, guess what? It’s also nothing too crazy! I’ve given my VM 8 vCPU (4 hyperthreaded cores) and 16 GBs of RAM. I’ve also given it 50 GBs of storage and a NAT vNIC. Beyond going through the steps of the Ubuntu installation (e.g., setting up an admin user and installing the OpenSSH server) and adding in my lab SSH key for public key authentication, I’ve done nothing else to this VM yet! Hopefully, that puts your mind at ease a little bit – we really don’t need a super crazy lab setup to make this work! That said, if this is the only VM we’ll be using, we better make sure it’s running all of the software we need! Without further ado, let’s dive in.
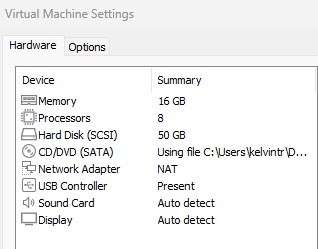
Figure 1: VMware Settings for the Lab VM
Installing Docker
Docker is the container engine/runtime that we’ll be using to launch the containers that will be hosting all of the services we need for this experiment, whether it’s the actual SR Linux network devices themselves or the GitLab instance that we’ll be using. Check out the Docker installation documentation for more instructions detailing how to install Docker.
The first step to installing Docker is to tell our system about where to actually find the Docker software packages by adding in the Docker repositories. We’ll do that by pain-stakingly typing all of these commands in manuall…ha, sike! Gotcha! Nope, not doing that when copying and pasting the exact sequence of commands from the documentation works just fine:
# Add Docker's official GPG key:
sudo apt update
sudo apt install ca-certificates curl
sudo install -m 0755 -d /etc/apt/keyrings
sudo curl -fsSL https://download.docker.com/linux/ubuntu/gpg -o /etc/apt/keyrings/docker.asc
sudo chmod a+r /etc/apt/keyrings/docker.asc

# Add the repository to Apt sources:
sudo tee /etc/apt/sources.list.d/docker.sources <<EOF
Types: deb
URIs: https://download.docker.com/linux/ubuntu
Suites: $(. /etc/os-release && echo "${UBUNTU_CODENAME:-$VERSION_CODENAME}")
Components: stable
Signed-By: /etc/apt/keyrings/docker.asc
EOF

sudo apt update
Work smarter, not harder, folks!
With that done, all we need to do is actually install the Docker packages onto our system. Did I type this one in manually, or did I do a little bit of Ctrl-C, Ctrl-V-jitsu? Take your wildest guess!
administrator@clab-blogpost:~$ sudo apt install docker-ce docker-ce-cli containerd.io docker-buildx-plugin docker-compose-plugin
Reading package lists... Done
Building dependency tree... Done
Reading state information... Done
The following additional packages will be installed:
  docker-ce-rootless-extras libslirp0 pigz slirp4netns
Suggested packages:
  cgroupfs-mount | cgroup-lite docker-model-plugin
The following NEW packages will be installed:
  containerd.io docker-buildx-plugin docker-ce docker-ce-cli docker-ce-rootless-extras docker-compose-plugin
  libslirp0 pigz slirp4netns
0 upgraded, 9 newly installed, 0 to remove and 1 not upgraded.
Need to get 92.8 MB of archives.
After this operation, 371 MB of additional disk space will be used.
Do you want to continue? [Y/n] y
Finally, with Docker fully installed onto our system, there’s one last housekeeping step to perform. Normally, Docker requires administrative privileges (i.e., running sudo) to run most Docker commands (e.g., starting a container). However, rather than type in sudo for every Docker command we run, there’s a simple alternative: use a group called docker and add our user to it, which will give our user direct authorization to administer Docker, rather than relying on root privileges.
We’ll see that, after adding our user to the docker group and running the newgrp docker command to get our system to recognize the new group that we’ve added our user to, we’re able to run the command to launch the test hello-world container and validate that our Docker installation is indeed functioning properly.
administrator@clab-blogpost:~$ sudo usermod -aG docker $USER
administrator@clab-blogpost:~$ newgrp docker
administrator@clab-blogpost:~$ docker run hello-world
Unable to find image 'hello-world:latest' locally
latest: Pulling from library/hello-world
17eec7bbc9d7: Pull complete
ea52d2000f90: Download complete
Digest: sha256:05813aedc15fb7b4d732e1be879d3252c1c9c25d885824f6295cab4538cb85cd
Status: Downloaded newer image for hello-world:latest

Hello from Docker!
This message shows that your installation appears to be working correctly.

To generate this message, Docker took the following steps:
 1. The Docker client contacted the Docker daemon.
 2. The Docker daemon pulled the "hello-world" image from the Docker Hub.
    (amd64)
 3. The Docker daemon created a new container from that image which runs the
    executable that produces the output you are currently reading.
 4. The Docker daemon streamed that output to the Docker client, which sent it
    to your terminal.

To try something more ambitious, you can run an Ubuntu container with:
 $ docker run -it ubuntu bash

Share images, automate workflows, and more with a free Docker ID:
 https://hub.docker.com/

For more examples and ideas, visit:
 https://docs.docker.com/get-started/
Now, let’s actually dive into deploying the things that we’ll be running on this Docker installation, starting off with…
Installing Containerlab
Containerlab is…the thing we’ve already talked about in part 1! No intro needed, so let’s just jump right into installing it. Check out the Containerlab website for more details about installation and general documentation about how to use Containerlab to do a whole lot of cool stuff!
Installing Containerlab isn’t a particularly complicated undertaking. All we need to do, for most common platforms, is run the Bash script hosted at https://get.containerlab.dev. “Kelvin, did you type this command manually or copy and paste it from the documentation???” I think you know the answer to that by now!
administrator@clab-blogpost:~$ bash -c "$(curl -sL https://get.containerlab.dev)"
Downloading https://github.com/srl-labs/containerlab/releases/download/v0.72.0/containerlab_0.72.0_linux_amd64.deb
Preparing to install containerlab 0.72.0 from package
Selecting previously unselected package containerlab.
(Reading database ... 87696 files and directories currently installed.)
Preparing to unpack .../containerlab_0.72.0_linux_amd64.deb ...
Unpacking containerlab (0.72.0) ...
Setting up containerlab (0.72.0) ...
Please run the command 'sudo usermod -aG clab_admins <insert your username here> && newgrp clab_admins' to ensure that you are part of the Container admin group. You can check this by running 'groups'.
  ____ ___  _   _ _____  _    ___ _   _ _____ ____  _       _
 / ___/ _ \| \ | |_   _|/ \  |_ _| \ | | ____|  _ \| | __ _| |__
| |  | | | |  \| | | | / _ \  | ||  \| |  _| | |_) | |/ _` | '_ \
| |__| |_| | |\  | | |/ ___ \ | || |\  | |___|  _ <| | (_| | |_) |
 \____\___/|_| \_| |_/_/   \_\___|_| \_|_____|_| \_\_|\__,_|_.__/

    version: 0.72.0
     commit: 60c9eee8a
       date: 2025-12-03T12:31:48Z
     source: https://github.com/srl-labs/containerlab
 rel. notes: https://containerlab.dev/rn/0.72/
Let’s go ahead and follow the suggestion of our installer and add our local user account to the clab_admins group, alongside refreshing our group membership with the newgrp command, in order to ensure that we have the proper permissions to run clab commands.
administrator@clab-blogpost:~$ sudo usermod -aG clab_admins $USER
administrator@clab-blogpost:~$ newgrp clab_admins
administrator@clab-blogpost:~$ groups
clab_admins adm cdrom sudo dip plugdev lxd docker administrator
Boom, just like that! We’re good to go with our basic Containerlab installation! Beyond that, since we want to run SR Linux containers as our virtualized network devices, we’ll need to pull down (i.e., download) the container image for SR Linux from the GitHub Container Registry (GHCR), where Nokia has decided to host it. We’ll do that by pointing the docker pull command to the URL for the container image (ghcr.io/nokia/srlinux:latest). Take note of this URL, by the way – we’ll be using it when it comes time to reference this image during the creation of the nodes in our lab topology.
FYI - the “latest” tag in that URL means that we’re downloading the latest version. I’ll be honest: you probably figured that one out on your own! However, the less obvious fact is that we can also elect to download the non-latest versions (i.e., previous versions) of SR Linux by appending the specific version number we want behind the colon, instead of latest. You can visit that ghcr.io URL in your web browser to see the list of available versions, like so:
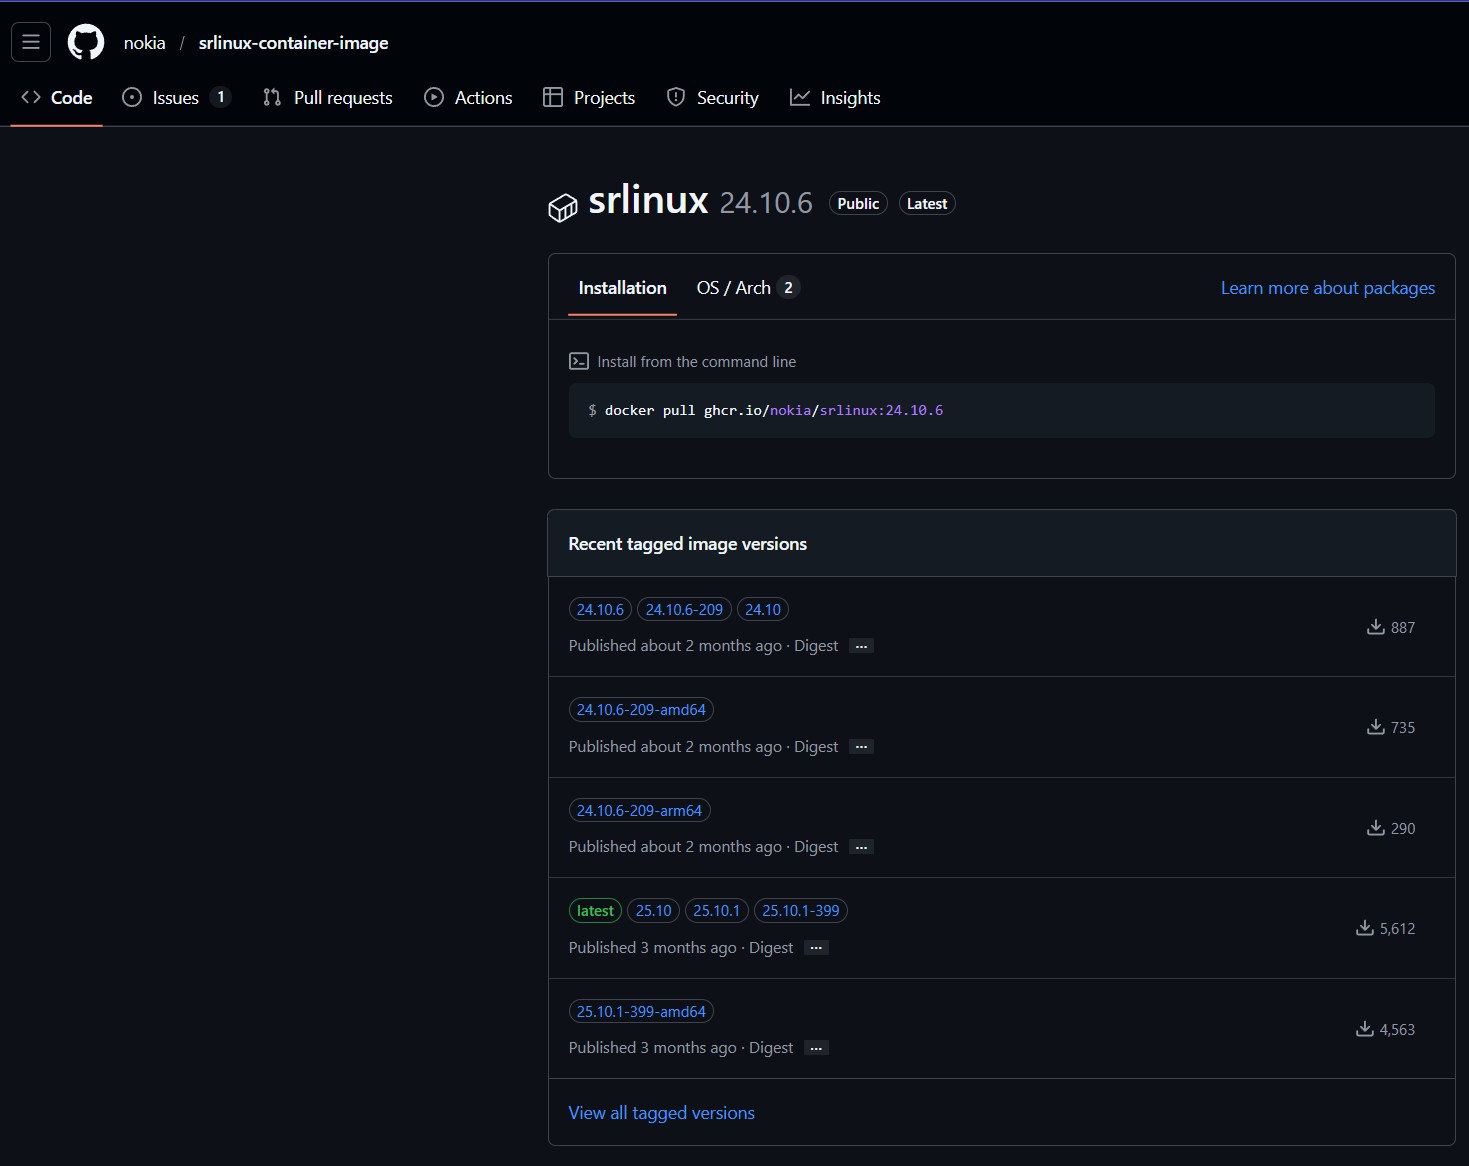
Figure 2: Versions of the SR Linux container
Note, however, that downloading a previous version will change the URL that you use to pull down the image and, therefore, the name of the image that we reference in creating the nodes in our lab, since the two are the same by default.
administrator@clab-blogpost:~$ docker pull ghcr.io/nokia/srlinux:latest
latest: Pulling from nokia/srlinux
360d0a66b6a8: Pull complete
Digest: sha256:bc8112667b5a87bee5039ade65b504ac2ef35511210d0675db6c7b0754e8cc4c
Status: Downloaded newer image for ghcr.io/nokia/srlinux:latest
ghcr.io/nokia/srlinux:latest
administrator@clab-blogpost:~$ docker image ls
IMAGE                          ID             DISK USAGE   CONTENT SIZE
ghcr.io/nokia/srlinux:latest   bc8112667b5a       3.23GB          747MB
hello-world:latest             05813aedc15f       25.9kB         9.52kB
And, just like that, the image for SR Linux is saved locally! Whatever you may think of Nokia/SR Linux, you do have to admit that it’s pretty cool of them to offer this fully-featured software openly and for free!
Deploying GitLab
There’s two questions that we need to answer when we’re building a CI/CD pipeline:
- How are we planning on hosting the Git repository that stores our configuration/automation scripts?
- How are we planning to actually build out the CI/CD pipeline?
Fortunately, GitLab gives us the answer to both of these questions! Not only does it act as a fully featured Git solution to host our repository, it also includes some awesome native tools for CI/CD! That said, you might be like “um…Kelvin, doesn’t GitHub also satisfy both of these requirements?” That is true! GitHub does, of course, serve as a place to host Git repositories and it also includes GitHub Actions for CI/CD! However, GitLab has a third big advantage for us: it is fully self-hostable for free using the Community Edition! Boo-yah – let’s do this! We’ll be running GitLab as…you guessed it: a Docker container!
The first thing we’ll do is create a containers folder in our home directory. This will be used for storing all of the files that we need to run the GitLab container, alongside some other containers. Namely, this includes the docker-compose.yml file that we’ll be using to define our specifications for the GitLab container, as well as all of the persistent data that the container needs to…y’know, do its job and actually host our Git repositories!
administrator@clab-blogpost:~$ mkdir containers
administrator@clab-blogpost:~$ cd containers
administrator@clab-blogpost:~/containers$
From there, let’s actually build out our docker-compose.yml file. For context, Docker Compose is an additional tool created by the Docker folks that allows us to easily define all of the things that we’ll need for our project in a file. Very often, we’re not just working with a single container. Most projects are more complicated and involve multiple containers, container networks, persistent volumes, etc. Rather than defining each of these using individual Docker commands, Docker Compose allows us to specify all of the settings for these elements in a single file. After we define the file, we just need to run docker compose up -d to build all of the elements we defined in the Docker Compose file and bring up all of our containers in detached mode (i.e., without bringing up the CLI of the containers).
administrator@clab-blogpost:~/containers$ cat docker-compose.yml
name: net-automation-pipeline-lab

services:
  gitlab:
    image: gitlab/gitlab-ce:latest
    ports:
      - "8900:8900"
      - "2222:22"
    environment:
      GITLAB_OMNIBUS_CONFIG: |
        external_url 'http://192.168.8.130:8900'
        gitlab_rails['gitlab_shell_ssh_port'] = 2222
    volumes:
      - './gitlab/config:/etc/gitlab'
      - './gitlab/logs:/var/log/gitlab'
      - './gitlab/data:/var/opt/gitlab'
We’ll be adding more to this Docker Compose file, but for now, this is good enough to get started with GitLab! In case you’re unfamiliar with Docker Compose syntax, this file:
- Defines a name for this “project” (i.e., a collection of related Docker elements)
- Defines a container named “gitlab” using the latest GitLab CE container image, exposing two ports (tcp/8900 mapped to tcp/8900 in the container for web access and tcp/2222 mapped to tcp/22 in the container for SSH access)
- Specifying the external URL for the GitLab instance as “http://192.168.8.130:8900” (the IP address of the VM and the appropriate port number). We don’t technically have to do this, as we could just map tcp/8900 to the default HTTP port of tcp/80. However, doing this will allow GitLab to automatically populate the correct URL in the GitLab GUI wherever it’s used (e.g., for the auto-generated URL we can copy to locally clone a repository)
- Changing the default SSH port for the GitLab container to 2222
- Mapping folders on the local filesystem of the container host to folders inside of the filesystem of the container, so that data stored by the container in these locations (e.g., logs, configuration, and repository data) is persistent and saved across container reboots.
Nice! Let’s go ahead and bring this GitLab container to life! Muahahaah.
administrator@clab-blogpost:~/containers$ docker pull gitlab/gitlab-ce:latest
latest: Pulling from gitlab/gitlab-ce
df255cc79cfe: Pull complete
90bc2ebfb1f5: Pull complete
b84c2c2942b0: Pull complete
a3629ac5b9f4: Pull complete
ba40b3cf2198: Pull complete
b175af4d3a30: Pull complete
6b2bac0c2448: Pull complete
0e94668ed4aa: Pull complete
94dccf1505e8: Pull complete
Digest: sha256:f6ed2e5b9df47279b16fc0abbc163fca30559d8101b886e80dd09f1edfd383f9
Status: Downloaded newer image for gitlab/gitlab-ce:latest
docker.io/gitlab/gitlab-ce:latest
administrator@clab-blogpost:~/containers$ docker compose up -d
[+] up 2/2
 ✔ Network net-automation-pipeline-lab_default    Created                                                     0.0s
 ✔ Container net-automation-pipeline-lab-gitlab-1 Created                                                     0.9s
Note that I did a separate docker pull command to download the GitLab CE image before running docker compose up. This isn’t strictly necessary, as Docker Compose will automatically download any required container images that aren’t already present in the local container image registry, but it’s a habit for me to do docker pull separately at this point. Anyway, if we run a docker ps (or, equivalently, docker container ls), we’ll see that our GitLab container is up and running!
administrator@clab-blogpost:~/containers$ docker ps
CONTAINER ID   IMAGE                     COMMAND                  CREATED          STATUS                             PORTS                                                                                                   NAMES
c05ef6192e86   gitlab/gitlab-ce:latest   "/assets/init-contai…"   16 seconds ago   Up 14 seconds (health: starting)   80/tcp, 443/tcp, 0.0.0.0:8900->8900/tcp, [::]:8900->8900/tcp, 0.0.0.0:2222->22/tcp, [::]:2222->22/tcp   net-automation-pipeline-lab-gitlab-1
Navigating to the IP address of our VM (in this case, 192.168.8.130) at tcp/8900 in our web browser, we’re greeted by the GitLab login page!
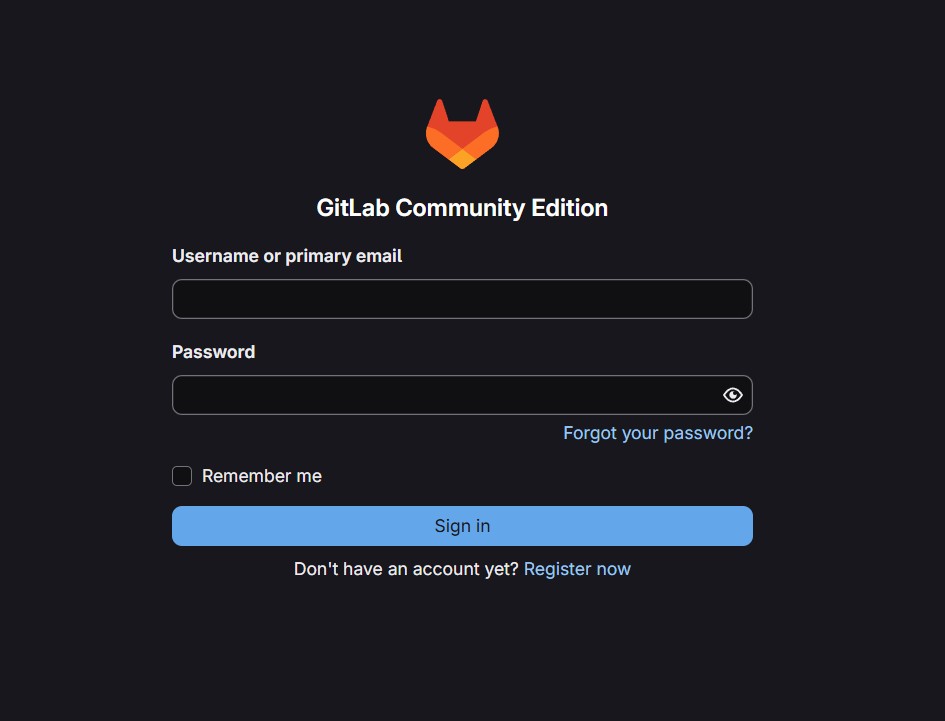
Figure 3: It’s aliveeeeee! GitLab is here!
The default credentials are root for the username and a randomly generated password. To retrieve this password, we’ll need to run this command: docker compose exec <name of container/service as defined in the Docker Compose file> cat /etc/gitlab/initial_root_password. This command retrieves and displays the text file on the system where the random root password is stored:
administrator@clab-blogpost:~/containers$ docker compose exec gitlab cat /etc/gitlab/initial_root_password
# WARNING: This password is only valid if ALL of the following are true:
#          • You set it manually via the GITLAB_ROOT_PASSWORD environment variable
#            OR the gitlab_rails['initial_root_password'] setting in /etc/gitlab/gitlab.rb
#          • You set it BEFORE the initial database setup (typically during first installation)
#          • You have NOT changed the password since then (via web UI or command line)
#
#          If this password doesn't work, reset the admin password using:
#          https://docs.gitlab.com/security/reset_user_password/#reset-the-root-password

Password: ZRqtcQL7p0BqUPcKLqejXDcS6eHO73d4xVxAAM93m9o=

# NOTE: This file is automatically deleted after 24 hours on the next reconfigure run.
Copying and pasting that password into our login page, along with the root username, bam! We’re in!
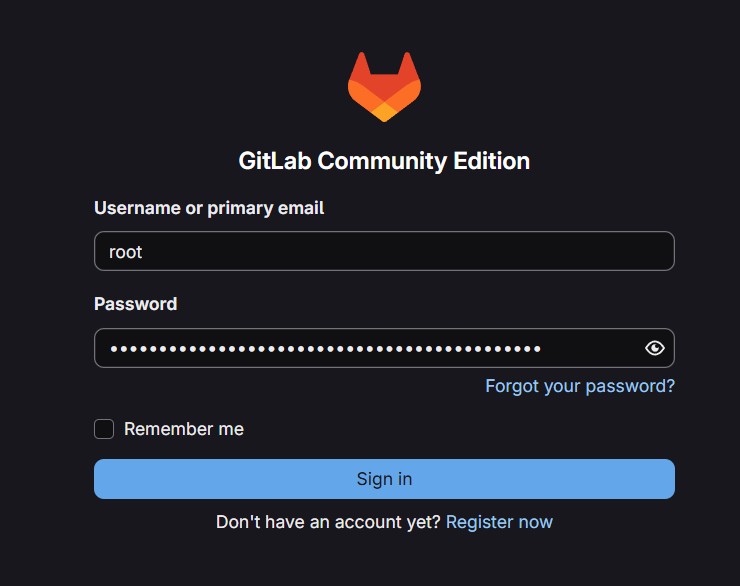
Figure 4: Logging in with our default credentials
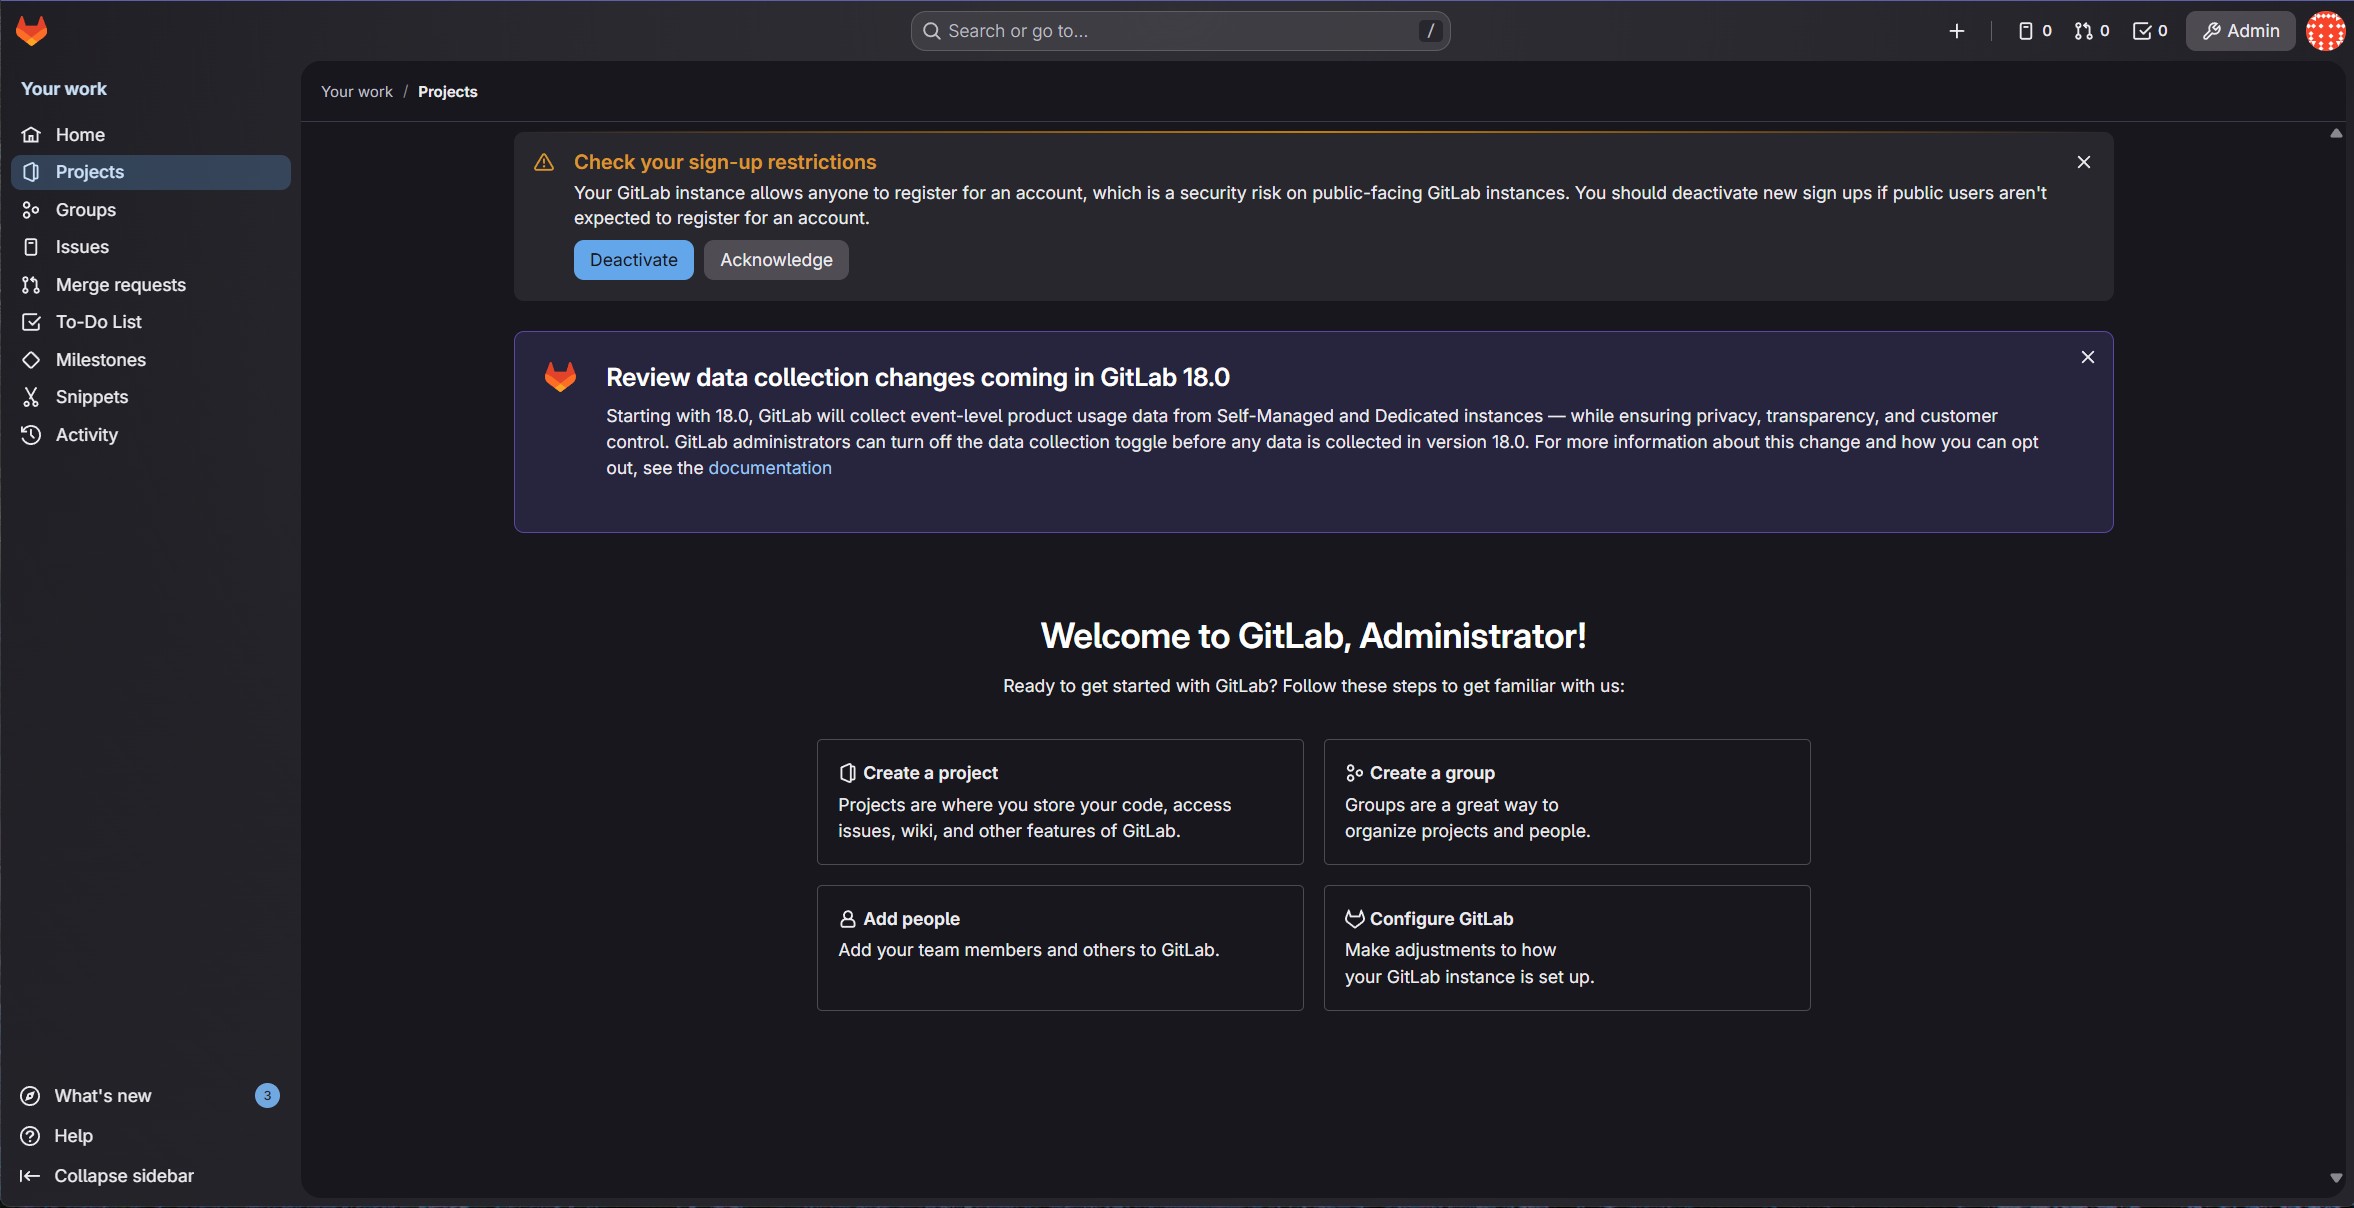
Figure 5: We’re in!
Let’s acknowledge/dismiss all of these alerts here – we don’t need to worry about any of them right now! We’ll also go ahead and reset the root password by clicking on the Admin button in the top right-hand corner and navigating to Overview -> Users in the left-hand sidebar of the admin area. From there, we’ll click on the Administrator account (the only account present on a default GitLab install), click on the Edit button in the top right, set a new password under the Password section, and save our changes! At this point, it’ll automatically log us out. After we type in our new credentials, though, we’ll be back in and golden!

Figure 6: Click on the Admin button, then click on the Users tab under the Overview section in the left-hand sidebar and click on the Administrator account

Figure 7: Click on the Edit button in the top right-hand corner
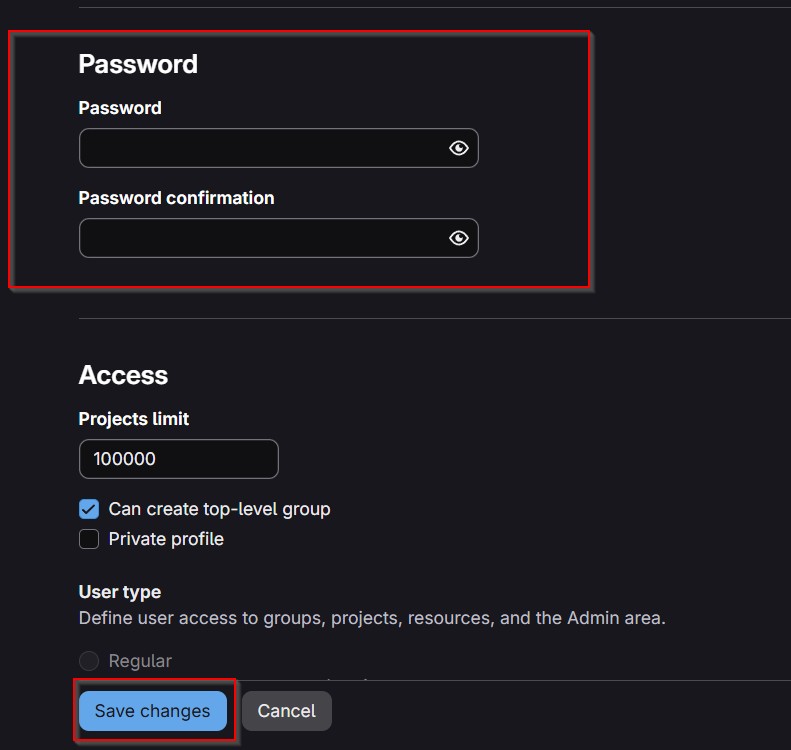
Figure 8: Set the new password and click Save Changes
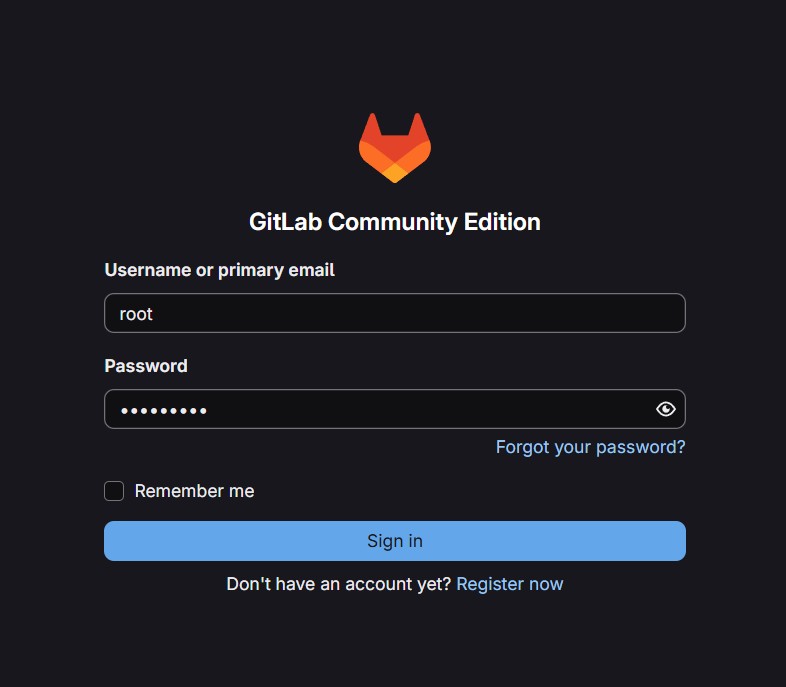
Figure 9: Logging in with the new credentials
Deploying the GitLab Runner
No superhero acts alone! Batman has Robin and GitLab has the GitLab Runner! GitLab relies on a separate runner machine in order to actually do the dirty work of executing the tasks that are part of the CI/CD pipeline, such as running the scripts that are involved in testing our configuration and firing up our lab in Containerlab to create the test network/digital twin for the CI/CD pipeline to leverage during its execution. Normally, in a production environment, it’s recommended to keep GitLab and its runner on separate physical hardware to reduce the dependency on a single point of failure and prevent resource overload.
However, ain’t no one got time for all of that “best practice” nonsense in our lab environment, so let’s just run our GitLab Runner (run the runner – ooh, that has a nice ring to it) in a separate Docker container on the same container host. Accomplishing this will require adding some extra configuration under the services section of our docker-compose.yml file, so let’s get to that:
  gitlab-runner:
    image: gitlab/gitlab-runner:latest
    volumes:
      - '/var/run/docker.sock:/var/run/docker.sock'
      - './runner/config:/etc/gitlab-runner'
This creates a gitlab-runner container using the latest GitLab Runner image from the Docker Hub (which, as of the time of this blog post, is based on Ubuntu 24.04) and exposes two parts of our container host’s filesystem to this container. Firstly, it maps a configuration directory in the project folder for GitLab Runner to use when writing its configuration. Secondly, and less obviously, it also gives the runner access to the Docker installation on our container host. It does this by exposing the Docker socket (/var/run/docker.sock) of our container host to the runner container. This allows the runner and our main container host to “share” a single Docker installation (the one of the main container host) and allows the runner to start containers on the main container host. This will be extremely useful, as you might imagine, when the runner needs to actually fire up the devices that are part of our lab using Containerlab.
With all of that out of the way, let’s re-run our docker compose up -d command!
administrator@clab-blogpost:~/containers$ docker pull gitlab/gitlab-runner:latest
latest: Pulling from gitlab/gitlab-runner
bfa175aa4f36: Pull complete
20043066d3d5: Pull complete
13146dc4ed90: Pull complete
4512fc9ada1c: Pull complete
dacccfb1910d: Pull complete
504eb8f44368: Download complete
Digest: sha256:d90b8dddf621655c0eff77a999118f1a14a46862a04783d93ee0114e5384b500
Status: Downloaded newer image for gitlab/gitlab-runner:latest
docker.io/gitlab/gitlab-runner:latest
administrator@clab-blogpost:~/containers$ docker compose up -d
[+] up 2/2
 ✔ Container net-automation-pipeline-lab-gitlab-runner-1 Created                                              0.1s
 ✔ Container net-automation-pipeline-lab-gitlab-1        Running                                              0.0s
Bingo! After it pulls down the latest GitLab Runner container image, all of our containers are started! To verify our runner container, all we need to do is run the gitlab-runner --version command against the gitlab-runner container using the docker compose exec <name of container/service as defined in the Docker Compose file> gitlab-runner --version command:
administrator@clab-blogpost:~/containers$ docker compose exec gitlab-runner gitlab-runner --version
Version:      18.8.0
Git revision: 9ffb4aa0
Git branch:   18-8-stable
GO version:   go1.25.3 X:cacheprog
Built:        2026-01-15T15:55:25Z
OS/Arch:      linux/amd64
And, just like that, we’re off to the races!
Deploying NetBox
The last piece of the puzzle that we’ll need for now is NetBox! In case you’re unfamiliar with NetBox, it’s a pretty slick datacenter infrastructure management (DCIM) tool. What does that mean in English? Well, essentially, it’s software that allows us to map out and record all of the elements in our datacenter infrastructure. What elements, you may ask? Well, let me answer that with a question: when you think about what a datacenter contains, what do you think of?
Immediately, your brain might be bubbling with ideas like servers, switches, routers, firewalls, power supplies/devices (e.g., UPSs), racks, cables, etc. Great job – all of these are things that we can document and model inside of NetBox! However, this is purely focused on the physical side of the house. In reality, there are a lot more logical items that are part of our datacenter infrastructure and also need to be documented. IP addresses are a big one, for example! Big datacenters have lots of connections between devices, which requires lots of interface IP addresses! There’s also VRFs for multitenant datacenters, BGP ASNs, VLAN IDs/Layer 2 circuit information, etc.
NetBox gives us a convenient platform to keep track and, ultimately, make sense of this mountain of data to gain insights about our datacenter, such as how many devices we have. The most important thing to understand about NetBox is that it is designed to give us a single source of truth, meaning that it serves as the authority in our network for how our devices should be configured. Assuming we’ve configured NetBox correctly, if we encounter a scenario where our configuration differs from the intent that we’ve defined as part of the data stored in NetBox, we should always trust NetBox and work to rectify the device configuration to bring it back in line with the view that NetBox has. Of course, in the real world, mistakes happen in data entry to NetBox and it’s not always so simple, but it’s a helpful mental model to keep in mind to understand the purpose of NetBox in our networks.
This is crucial to understand, as it ties into a core NetBox design philosophy. To quote the NetBox developers themselves from their own documentation, “NetBox intends to represent the desired state of a network versus its operational state. As such, automated import of live network state is strongly discouraged.” You are NOT supposed to pipe data from your network devices into NetBox, since that would mean synchronizing any mistakes in the configuration over to the supposed “single source of truth.” This would completely kill the intended goal of NetBox, as it would be like writing an algebra textbook purely off of the words of a child learning 2nd grade math.
](/images/nokia-containerlab-digital-twin-cicd-setup/netbox-architecture.jpg)
Figure 10: Intended architecture/goal for NetBox, Image Source
As a bit of a tangent, this is why I don’t like calling NetBox an IP address management (IPAM) solution. A big part of the point behind IPAM solutions, such as InfoBlox, is to integrate with the network to gather operational data (e.g., via DNS and DHCP) about the IP addresses that are actually being used by the hosts on the network to get a true picture behind the real, current IP utilization. NetBox’s definition of IPAM, on the other hand, means “a way for you to document the IP addresses that you intend to configure on your devices,” so that you avoid relying on an Excel spreadsheet Does that technically count as “IP address management”? I suppose, but it’s a much different use case than other IPAM solutions, so I don’t love using the same term to describe both types. But, I digress!
Anyway, there’s another awesome reason to use NetBox for DCIM/IPAM (begrudgingly using that term…) – the all-encompassing API! That’s really the secret sauce behind NetBox. All of that documentation isn’t particularly helpful if it just sits there in our NetBox database twiddling its thumbs waiting for the day that we forget what IP address we’re supposed to use on an interface! Instead, think about this – what if we could have NetBox take a more active role in our configuration deployment/network automation process by leveraging it as part of our suite of tests? For example, suppose that one of the tests that we run during the execution of our CI/CD pipeline confirms that the correct BGP ASNs are being used in our configuration. Why would we want to hard-code the correct ASNs inside of our test script, when we’ve already documented all of that information inside of NetBox? We can just simply program our script to query the NetBox database and dynamically figure out the correct ASNs on the spot. This has NUMEROUS benefits! Firstly, it makes developing the script easier, since we don’t need to worry about including information that we’ve already documented elsewhere. Beyond that, making changes is a lot simpler using this approach. Suppose we’ve purchased a new ASN for use. All we need to do is add it to NetBox, instead of also worrying about adding it to the hard-coded list of ASNs in our test scripts. That way, all of our automation workflows that rely on a list of valid BGP ASNs for our datacenter can just rely on querying NetBox to consistently receive an up-to-date list of ASNs.
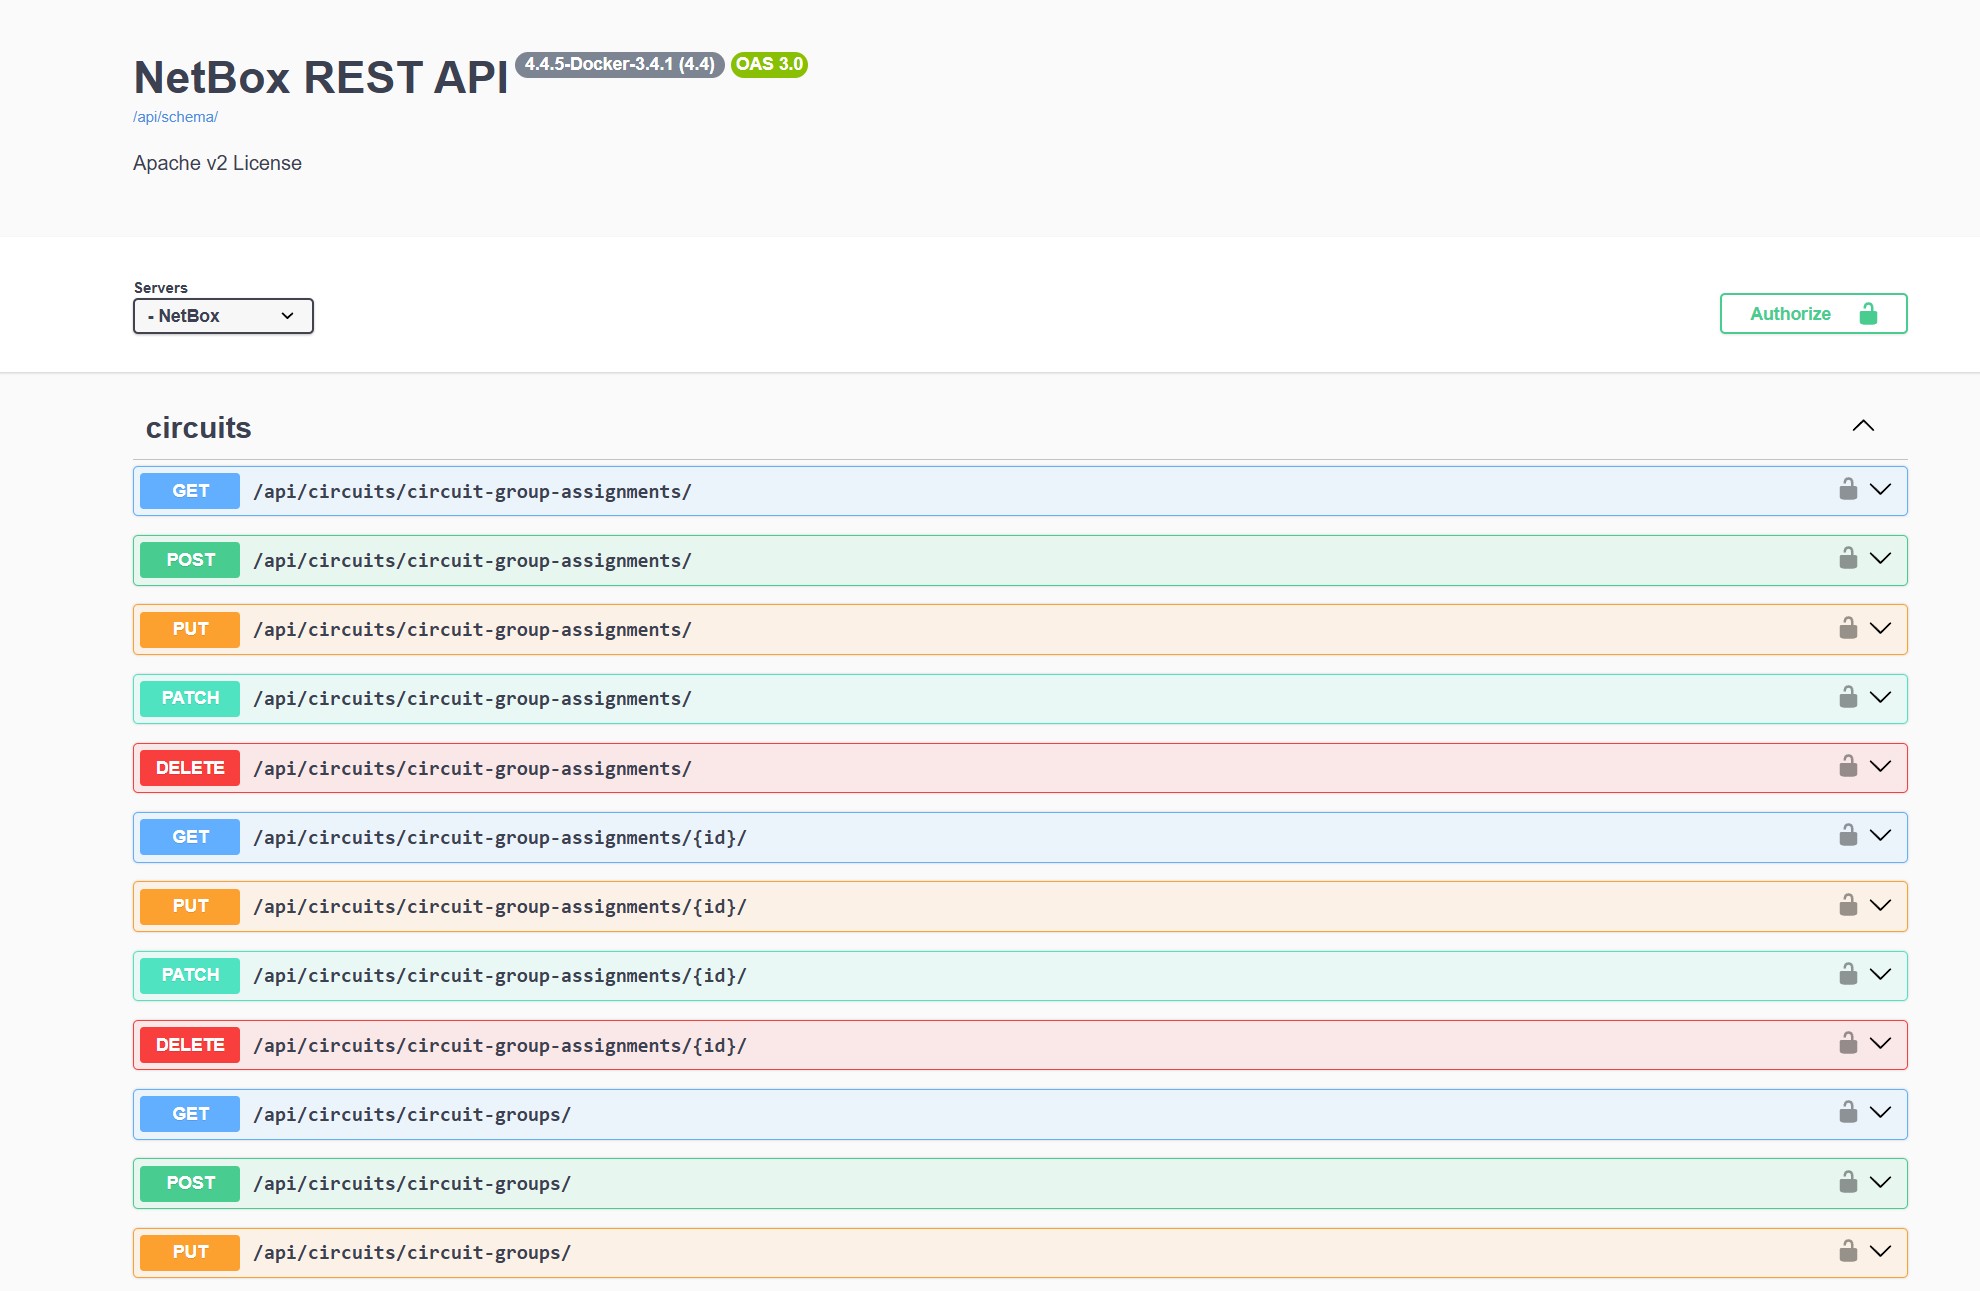
Figure 11: Swagger Documentation for NetBox API
That’s precisely why we’re deploying NetBox for this project. It’ll be VERY important, since we’ll be relying on it (after we populate its database with all of the details we have about our network, of course) to provide accurate data about the intended state of our network to our tests for our CI/CD pipeline. How are we gonna run NetBox? Did I hear the crowd yell “AS A CONTAINER!”? Yep! That’s exactly how! Now, unlike GitLab, NetBox has a lot of containers involved, since it requires separate database containers to function. As such, the kind folks at NetBox have done us a favor and built out a Git repository complete with a pre-defined Docker Compose file that we can just yoink and use! Thanks, NetBox folks!
Note that we’re deploying NetBox without any of the plethora of plugins that are available, for simplicity. We’ll just be using the base functionality of NetBox, as it’s enough for us. If you’d like to play around with plugins, there’s some documentation on the official
netbox-dockerrepository here describing the process for incorporating plugins into the Docker image. Essentially, it involves building a custom Docker image with the plugins enabled. I may do a blog post on that process sometime, as it can be a bit counterintuitive, but that’ll be for another day. If you need further help on it beyond that documentation, there are some helpful resources that can be found with a little bit of Google-fu.
All we need to do is clone the repository and change into the new directory. Note that I’ve done this in the home directory to keep NetBox separate from GitLab.
administrator@clab-blogpost:~$ git clone https://github.com/netbox-community/netbox-docker.git
Cloning into 'netbox-docker'...
remote: Enumerating objects: 5457, done.
remote: Counting objects: 100% (174/174), done.
remote: Compressing objects: 100% (100/100), done.
remote: Total 5457 (delta 146), reused 74 (delta 74), pack-reused 5283 (from 4)
Receiving objects: 100% (5457/5457), 1.43 MiB | 6.89 MiB/s, done.
Resolving deltas: 100% (3104/3104), done.
administrator@clab-blogpost:~$ cd netbox-docker/
administrator@clab-blogpost:~/netbox-docker$
From there, we’ll notice a lot of files in the directory. We don’t need to worry about 99% of these, as they’ll function just fine right out of the gate.
administrator@clab-blogpost:~/netbox-docker$ ls
actionlint.yml   docker                               Dockerfile      pyproject.toml              test-configuration
build-functions  docker-compose.override.yml.example  env             README.md                   test.sh
build-latest.sh  docker-compose.test.override.yml     LICENSE         release.sh                  VERSION
build.sh         docker-compose.test.yml              MAINTAINERS.md  renovate.json
configuration    docker-compose.yml                   PRINCIPALS.md   requirements-container.txt
However, what we do need to worry about is the docker-compose.override.yml.example file, which contains the settings for our NetBox instance. Specifically, it contains the port number for our NetBox GUI/API. By default, it’ll use tcp/8000, which is perfectly fine, as that doesn’t conflict with anything else running on this machine. However, we need to copy this file into a new, non-example file that NetBox will be looking for when we deploy its container.
administrator@clab-blogpost:~/netbox-docker$ cp docker-compose.override.yml.example docker-compose.override.yml
Boom! Here’s what that override file looks like, if you’re curious:
administrator@clab-blogpost:~/netbox-docker$ cat docker-compose.override.yml
services:
  netbox:
    ports:
      - "8000:8080"
    # If you want the Nginx unit status page visible from the
    # outside of the container add the following port mapping:
    # - "8001:8081"
    # healthcheck:
      # Time for which the health check can fail after the container is started.
      # This depends mostly on the performance of your database. On the first start,
      # when all tables need to be created the start_period should be higher than on
      # subsequent starts. For the first start after major version upgrades of NetBox
      # the start_period might also need to be set higher.
      # Default value in our docker-compose.yml is 60s
      # start_period: 90s
    # environment:
      # SKIP_SUPERUSER: "false"
      # SUPERUSER_API_TOKEN: ""
      # SUPERUSER_EMAIL: ""
      # SUPERUSER_NAME: ""
      # SUPERUSER_PASSWORD: ""
We’ll just leave that at its default values. All we need to do now is bring the Docker Compose project up, like so:
administrator@clab-blogpost:~/netbox-docker$ docker compose up -d
[+] up 51/51
 ✔ Image docker.io/valkey/valkey:8.1-alpine          Pulled                                                 302.3s
 ✔ Image docker.io/netboxcommunity/netbox:v4.4-3.4.1 Pulled                                                 312.3s
 ✔ Image docker.io/postgres:17-alpine                Pulled                                                 306.8s
 ✔ Network netbox-docker_default                     Created                                                0.0s
 ✔ Volume netbox-docker_netbox-media-files           Created                                                0.0s
 ✔ Volume netbox-docker_netbox-reports-files         Created                                                0.0s
 ✔ Volume netbox-docker_netbox-scripts-files         Created                                                0.0s
 ✔ Volume netbox-docker_netbox-postgres-data         Created                                                0.0s
 ✔ Volume netbox-docker_netbox-redis-data            Created                                                0.0s
 ✔ Volume netbox-docker_netbox-redis-cache-data      Created                                                0.0s
 ✔ Container netbox-docker-redis-cache-1             Created                                                1.2s
 ✔ Container netbox-docker-redis-1                   Created                                                1.2s
 ✔ Container netbox-docker-postgres-1                Created                                                1.2s
 ✘ Container netbox-docker-netbox-1                  Error dependency netbox failed to start                121.6s
 ✔ Container netbox-docker-netbox-worker-1           Created                                                0.1s
dependency failed to start: container netbox-docker-netbox-1 is unhealthy
This’ll take a few minutes after the command successfully completes before the containers become fully available. We’ll know when it’s available by navigating to the NetBox GUI in our web browser via http://<the IP address of our container host>:8000. Note that it’s HTTP, NOT HTTPS!
By the way, your container, like mine, may report that it’s unhealthy, but don’t be dismayed! This just happens sometimes. Often, it’ll still work, in spite of this. Give it a little while and try to access the GUI before you give up hope! Case in point, boom! It’s alive!
administrator@clab-blogpost:~/netbox-docker$ docker compose ps
NAME                          IMAGE                                         COMMAND                  SERVICE       CREATED         STATUS                   PORTS
netbox-docker-netbox-1        docker.io/netboxcommunity/netbox:v4.4-3.4.1   "/usr/bin/tini -- /o…"   netbox        4 minutes ago   Up 4 minutes (healthy)   0.0.0.0:8000->8080/tcp, [::]:8000->8080/tcp
netbox-docker-postgres-1      docker.io/postgres:17-alpine                  "docker-entrypoint.s…"   postgres      4 minutes ago   Up 4 minutes (healthy)   5432/tcp
netbox-docker-redis-1         docker.io/valkey/valkey:8.1-alpine            "docker-entrypoint.s…"   redis         4 minutes ago   Up 4 minutes (healthy)   6379/tcp
netbox-docker-redis-cache-1   docker.io/valkey/valkey:8.1-alpine            "docker-entrypoint.s…"   redis-cache   4 minutes ago   Up 4 minutes (healthy)   6379/tcp
Everything’s healthy! On top of that, we’ve got our beautiful GUI right here!
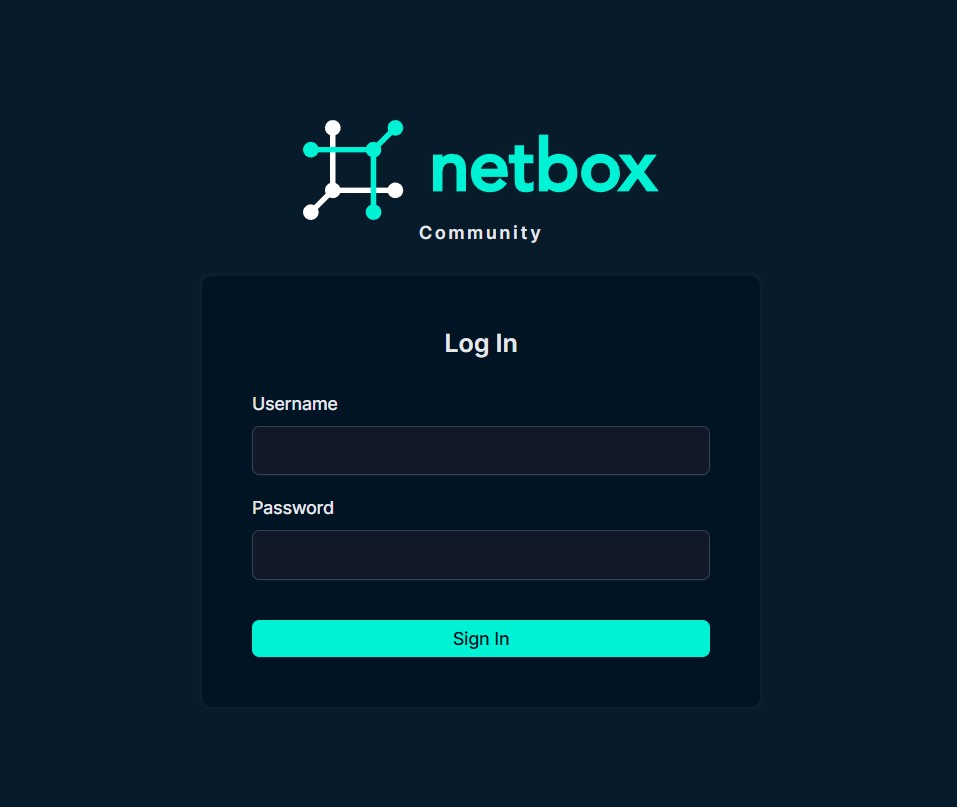
Figure 12: NetBox Login Page
From here, we’ll need to create an admin user, so that we can actually log in. To do this, we just need to run this command in our netbox-docker folder: docker compose exec netbox /opt/netbox/netbox/manage.py createsuperuser (yep, copied and pasted right from the documentation!) Afterwards, just follow the prompts to define our admin username, email, and password! The email doesn’t really matter, but we’ll need the other two to login.
administrator@clab-blogpost:~/netbox-docker$ docker compose exec netbox /opt/netbox/netbox/manage.py createsuperuser
🧬 loaded config '/etc/netbox/config/configuration.py'
🧬 loaded config '/etc/netbox/config/extra.py'
🧬 loaded config '/etc/netbox/config/logging.py'
🧬 loaded config '/etc/netbox/config/plugins.py'
Username: admin
Email address: [email protected]
Password:
Password (again):
This password is too short. It must contain at least 12 characters.
Bypass password validation and create user anyway? [y/N]: y
No active configuration revision found - falling back to most recent
Superuser created successfully.
With those credentials, we’re in! Perfect.
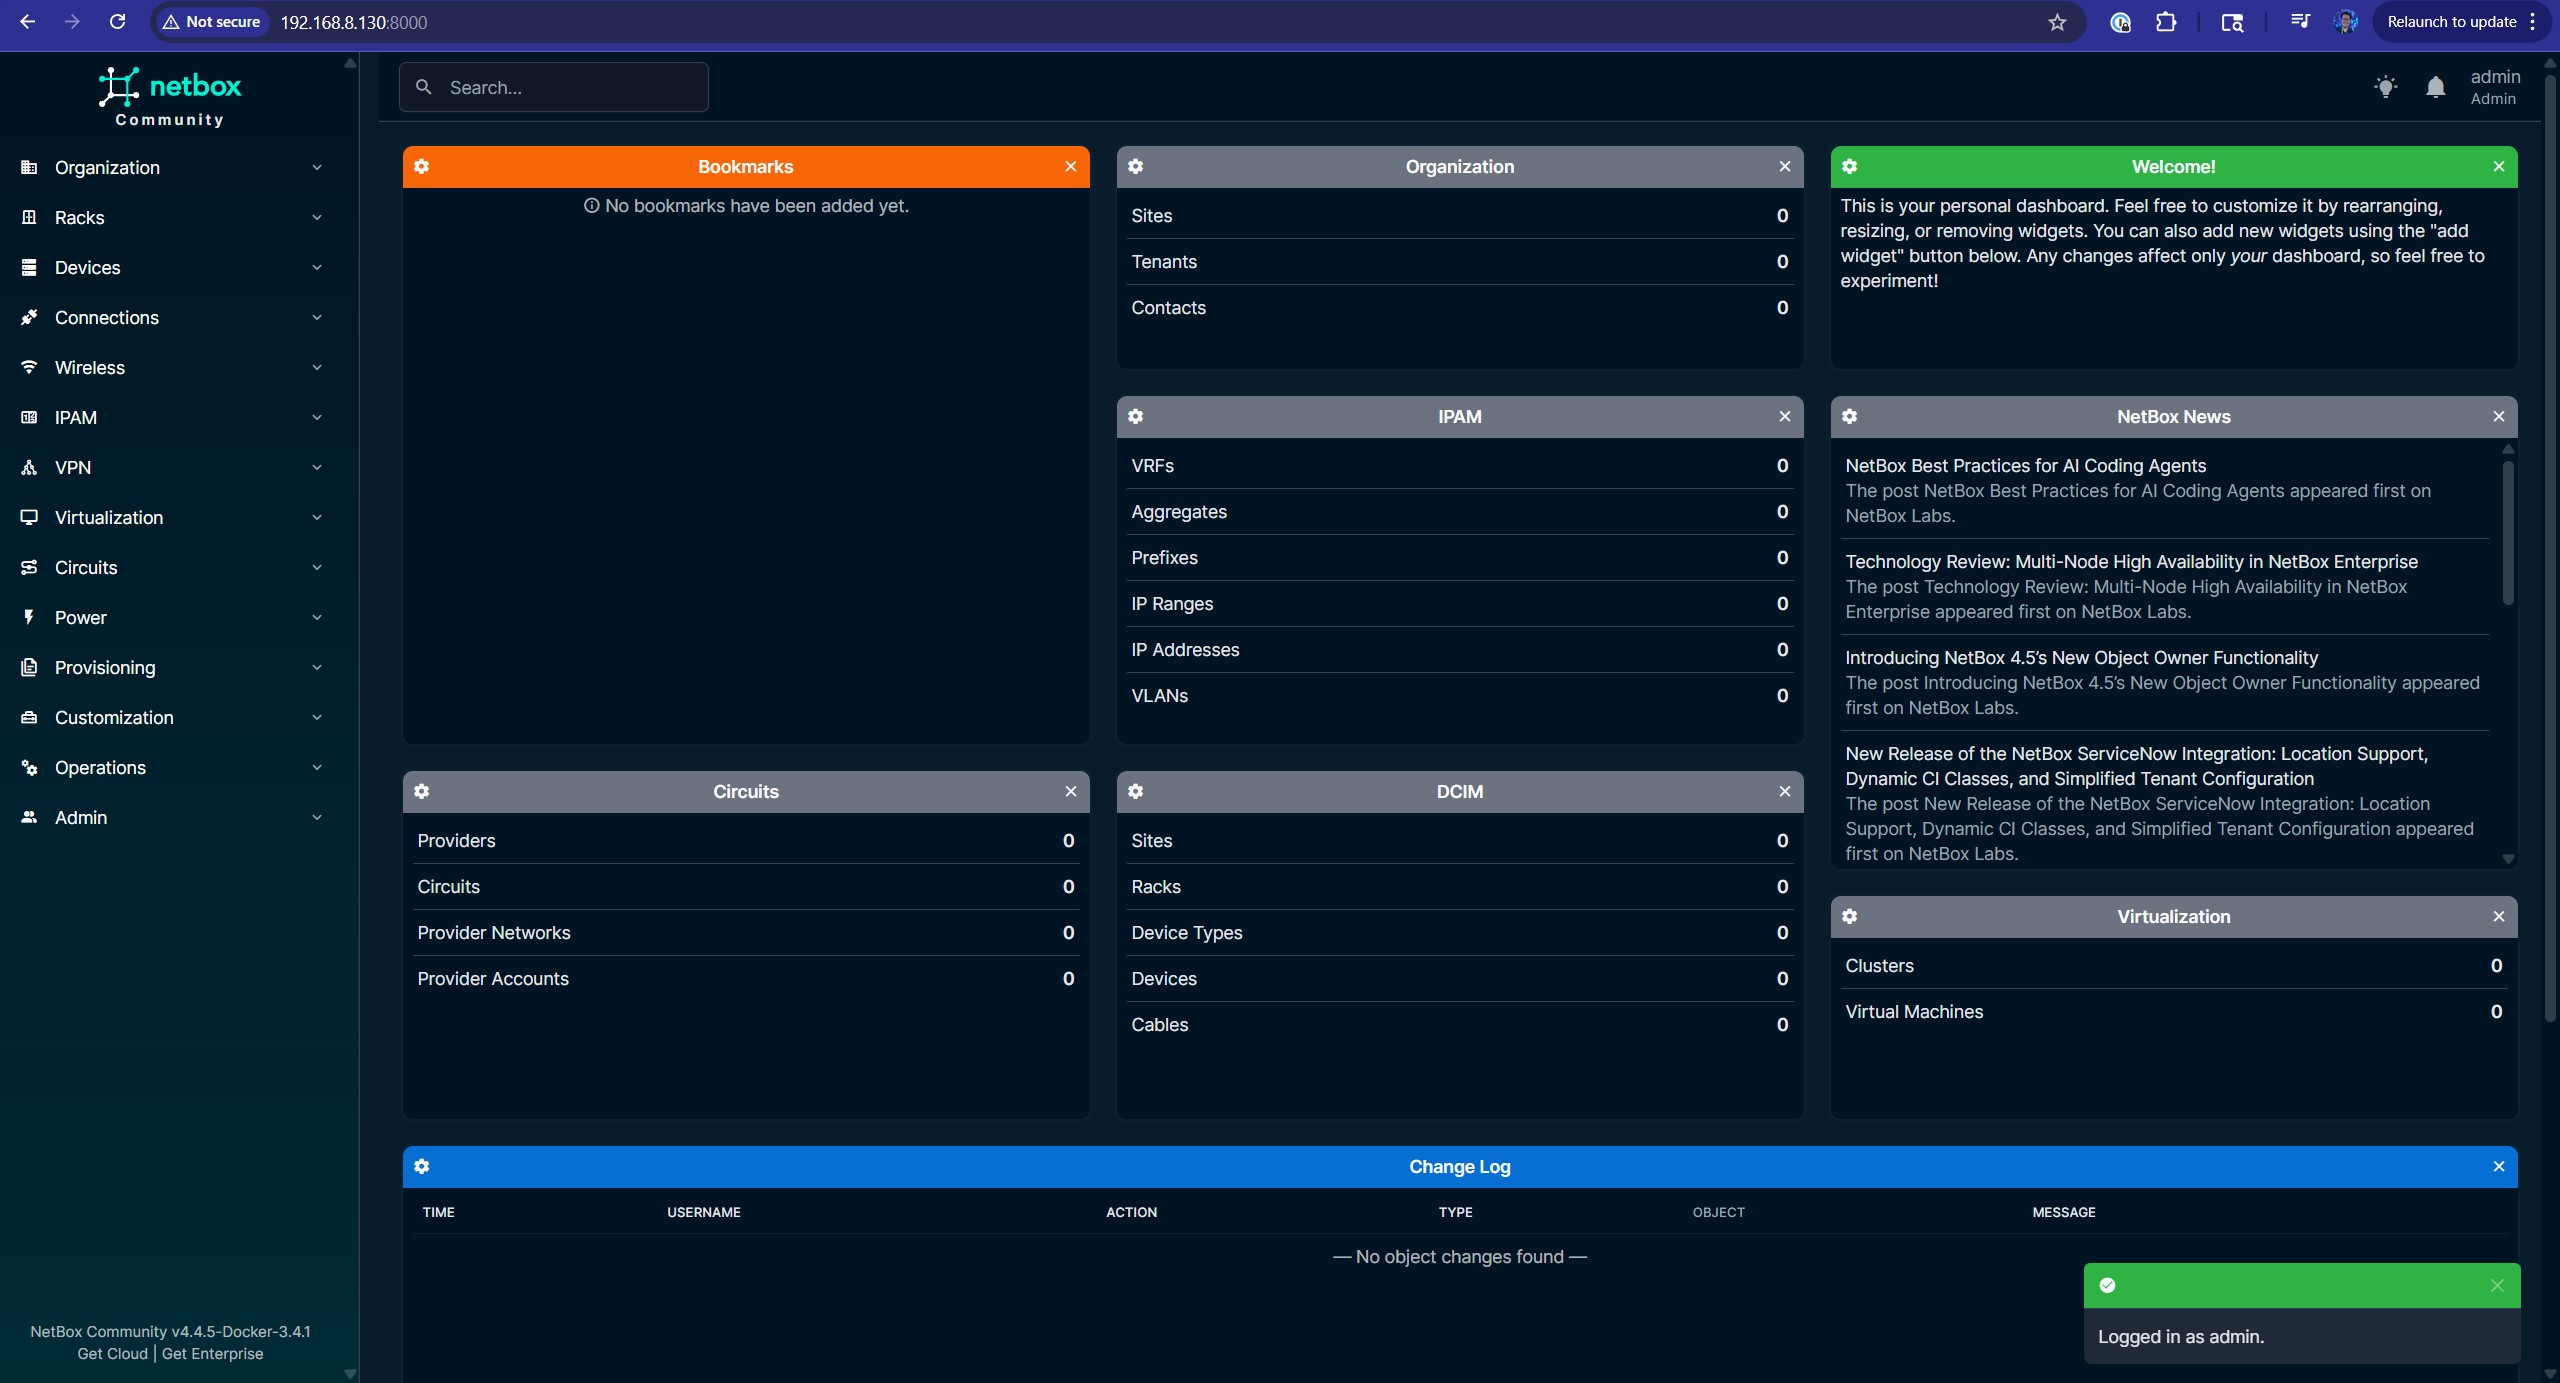
Figure 13: NetBox Main Page
Deploying HashiCorp Vault
  vault:
    image: hashicorp/vault:latest
    ports:
      - "8200:8200"
    environment:
      VAULT_ADDR: "http://192.168.8.130:8200"
      VAULT_LOCAL_CONFIG: '{"storage": {"file": {"path": "/vault/file"}}, "listener": [{"tcp": { "address": "0.0.0.0:8200", "tls_disable": true}}], "default_lease_ttl": "168h", "max_lease_ttl": "720h", "ui": true}VAULT_LOCAL_CONFIG={"storage": {"file": {"path": "/vault/file"}}, "listener": [{"tcp": { "address": "0.0.0.0:8200", "tls_disable": true}}], "default_lease_ttl": "168h", "max_lease_ttl": "720h", "ui": true}'
    cap_add:
      - IPC_LOCK
    volumes:
      - "./vault/logs:/vault/logs"
      - "./vault/file:/vault/file"
    command: server
administrator@clab-blogpost:~/containers$ docker pull hashicorp/vault:latest
latest: Pulling from hashicorp/vault
2b918d8a17a6: Pull complete
c7116af0bedc: Pull complete
410ae40141fd: Pull complete
d4de213a3994: Pull complete
a1e674c14cdf: Pull complete
2edcc5e30608: Pull complete
Digest: sha256:eb0ba6836e8d4699b7a1e8ca70d8433f7b87dcd067e6d82dff237d3ed2600ea0
Status: Downloaded newer image for hashicorp/vault:latest
docker.io/hashicorp/vault:latest
administrator@clab-blogpost:~/containers$ docker compose up -d
[+] up 3/3
 ✔ Container net-automation-pipeline-lab-vault-1         Created                                              0.4s
 ✔ Container net-automation-pipeline-lab-gitlab-1        Running                                              0.0s
 ✔ Container net-automation-pipeline-lab-gitlab-runner-1 Running                                              0.0s
Remotely Connecting to the VM with VS Code
The last step of the VM setup is going to…mostly be done on our main workstation! Another really cool thing about Containerlab is its VS Code extension, which gives us a cool GUI and very well-integrated workflow to work with the YAML files that define our actual lab topologies. However, this presents an interesting challenge for us. The VS Code extension is expecting to be installed on the system that’s actually running Containerlab – in this case, our VM. However, we can’t install VS Code on there, on account of our GUI for Ubuntu being…a command line interface! We could install a desktop environment, but a far more convenient solution is to use VS Code on our main workstation in conjunction with the Remote: SSH feature, which allows us to use VS Code on one system (e.g., our main workstation) as though it were installed on another system by having VS Code connect to the remote system via SSH. As such, all of the commands, files, etc. that we work with inside of VS Code will actually live on the remote system. It’s like mind control, but for VS Code!
To get started, if you haven’t already, install VS Code from this link. After you’re done installing it and inevitably spending 4 hours finding the perfect colors for your theme (don’t worry, we’ve all done it!), navigate to the Extensions tab in the sidebar; the icon for it looks like a grid of four squares with a slightly off-kilter square in the top-right. Or, if you want to be more imaginative, it looks like the top-right square is goofing around and messing with the other three! Anwyay, from there, search for “Remote - SSH” and install it!
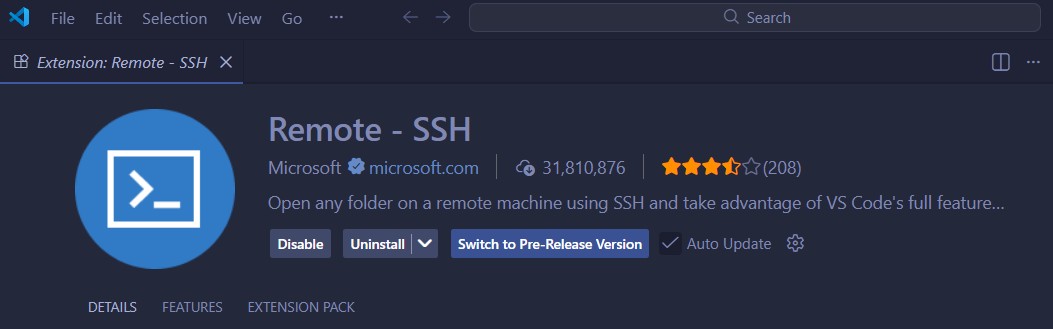
Figure 14: Remote SSH Extension in VS Code
This will install a few more extensions that it needs as dependencies. Don’t worry – this is perfectly normal! After everything’s finished installing, press F1 on your keyboard (or type > in the Search bar at the very top) and select the Remote-SSH: Connect to Host option. From there, we’ll click the button to Add New SSH Host… and type in the SSH connection command. This is the command that you would run in the terminal to SSH into the remote system (i.e., our VM, in this case), assuming that we’re using the standard OpenSSH client. If you’re just using password authentication, ssh <username>@<ip address/dns name> is enough. However, since I’m using public key authentication, like all of the cool kids do, I’ll need to throw in an extra -i parameter on mine to point to the private key file.

Figure 15: Command to SSH into the VM
Just like magic, we’ve got our command in there! By the way, it’s worth noting that, since I’m on Windows, the double backslash is used in the path to escape the backslashes (since backslashes are reserved characters in the shell) and get it to include one backslash in the actual path in the SSH config file, instead of none. Also, speaking of the SSH config file, it’ll ask us to select which SSH config file we want to use. In my case, I’ll choose the config file under my user specific directory, but you can also choose to use the global system SSH config if you’d like. Note that these paths will be different depending on what platform you have VS Code running on.
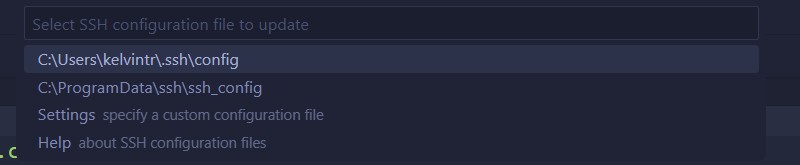
Figure 16: Choosing which config file to save our SSH host configuration to
After we do all of that, we’ll have a spiffy new entry in our SSH config file! Let’s check it out:
Host 192.168.8.130
  HostName 192.168.8.130
  User administrator
  IdentityFile C:\Users\kelvintr\Documents\SSHKeys\identity
Beautiful! Let’s connect now by pressing F1 again, choosing the Remote-SSH: Connect to Host option, and choosing our host from the list. This’ll spring a new VS Code window to life, where it either asks us for our password or, in my case, asks me for the encryption password to decrypt my private key file. After we log in successfully, it’ll ask us which platform/OS (Windows, Mac, or Linux) our remote system (i.e., our VM) is running and proceed to downloading “the VS Code Server”, which is a software package that runs on our remote system that allows VS Code to tap into its mind and make it do things it never believed was possible! …okay, maybe not that far, but it’ll let VS Code remotely manage the system!

Figure 17: The option to choose which SSH host to initiate the connection to - not much of a choice we have here lol!

Figure 18: The prompt to unlock the SSH key for authentication

Figure 19: The option to choose which platform (Windows/macOS/Linux) we’re connecting to, so that VS Code knows how to install the software to manage the remote system

Figure 20: The message showing that the VS Code server is being downloaded to the remote system; the main VS Code interface will launch after the server software is installed
After all of that’s done, we’ve now got a beautiful connection to our remote system, as evidenced by the indicator at the bottom-left corner of the VS Code GUI.
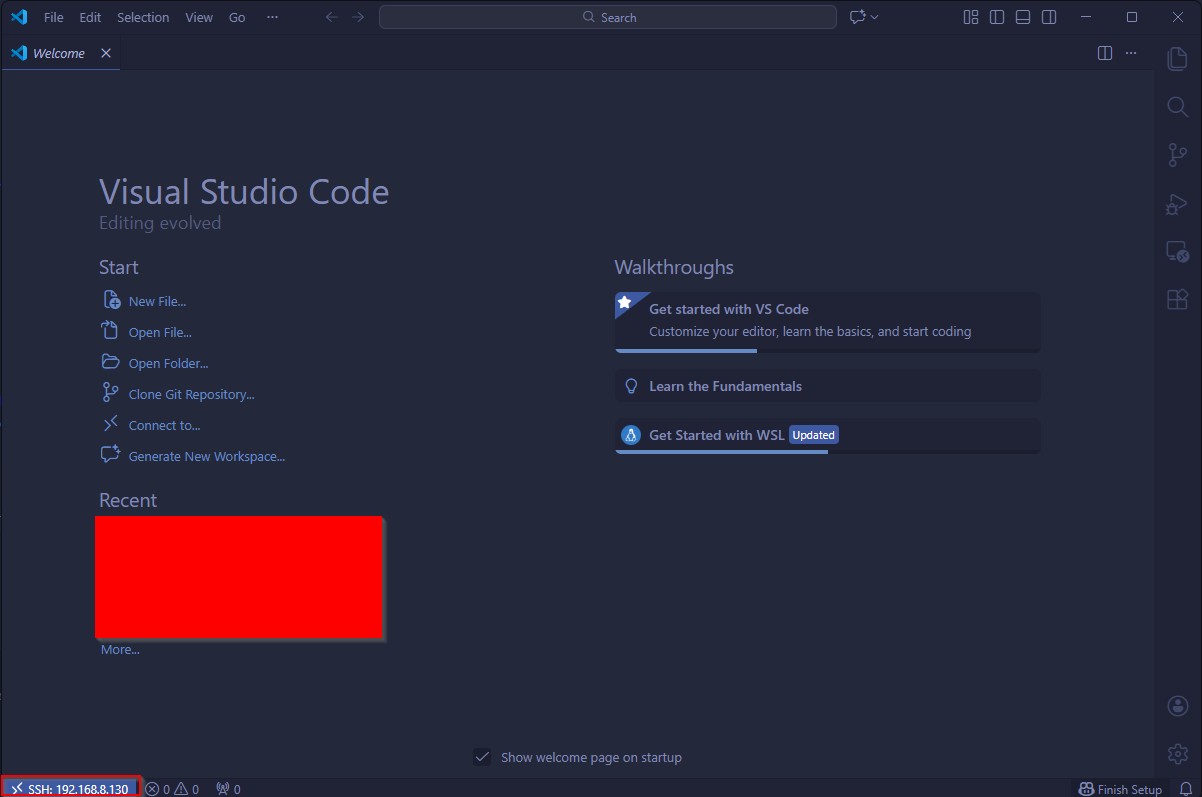
Figure 21: The Welcome page for the remote system in the VS Code GUI
Inside of this window, we need to install our Containerlab extension. By specifically installing the extension in the VS Code window that’s connected to the remote system, it’ll install the extension on the VS Code server running on our VM, as opposed to the VS Code instance running locally. As we mentioned earlier, that’s exactly what we want! Going back to the Extensions tab in our sidebar, then, all we need to do is search for “Containerlab” and install it.

Figure 22: Containerlab extension in the VS Code marketplace
After the extension is successfully installed, it’ll automatically pop up a Welcome to Containerlab page that contains some information about the extension and a way to easily get started by creating an example topology. Of course, because we’re sooooooo cool, we won’t be using this example topology, but thanks for the option, Containerlab – you’re a homie! This page is proof that we’re ready to go with creating our labs!
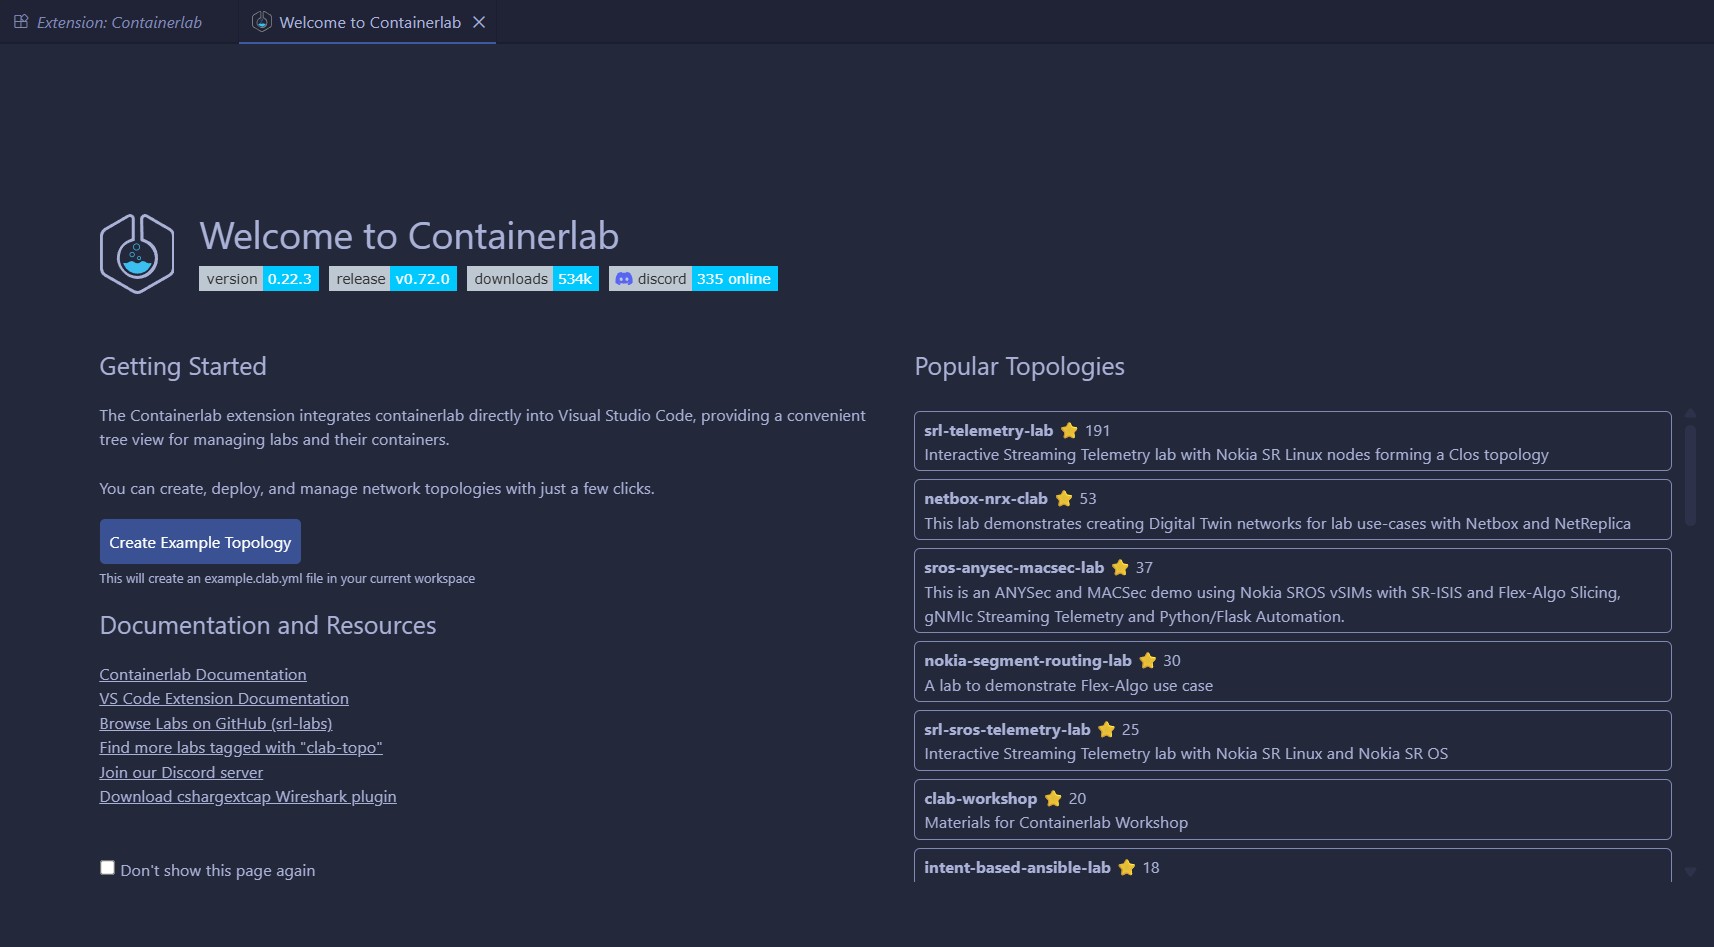
Figure 23: The Welcome page specifically for the Containerlab extension running on the remote system/VM
Conclusion
Boom! In the end, we’ve got everything we’ll need up and running, as we’ll see if we list all of our running containers:
administrator@clab-blogpost:~/containers$ docker ps
CONTAINER ID   IMAGE                               COMMAND                  CREATED       STATUS                 PORTS                                                                                                   NAMES
3f9b576d5e8c   hashicorp/vault:latest              "docker-entrypoint.s…"   2 hours ago   Up 2 hours             0.0.0.0:8200->8200/tcp, [::]:8200->8200/tcp                                                             net-automation-pipeline-lab-vault-1
6b25eacfd678   netboxcommunity/netbox:v4.4-3.4.1   "/usr/bin/tini -- /o…"   2 hours ago   Up 2 hours (healthy)   0.0.0.0:8000->8080/tcp, [::]:8000->8080/tcp                                                             netbox-docker-netbox-1
05001dd9c6da   postgres:17-alpine                  "docker-entrypoint.s…"   2 hours ago   Up 2 hours (healthy)   5432/tcp                                                                                                netbox-docker-postgres-1
4caf4fb52ad9   valkey/valkey:8.1-alpine            "docker-entrypoint.s…"   2 hours ago   Up 2 hours (healthy)   6379/tcp                                                                                                netbox-docker-redis-1
39dd2134b3a5   valkey/valkey:8.1-alpine            "docker-entrypoint.s…"   2 hours ago   Up 2 hours (healthy)   6379/tcp                                                                                                netbox-docker-redis-cache-1
69356ceb7c28   gitlab/gitlab-runner:latest         "/usr/bin/dumb-init …"   2 hours ago   Up 2 hours                                                                                                                     net-automation-pipeline-lab-gitlab-runner-1
c05ef6192e86   gitlab/gitlab-ce:latest             "/assets/init-contai…"   2 hours ago   Up 2 hours (healthy)   80/tcp, 443/tcp, 0.0.0.0:8900->8900/tcp, [::]:8900->8900/tcp, 0.0.0.0:2222->22/tcp, [::]:2222->22/tcp   net-automation-pipeline-lab-gitlab-1
Now that we’ve installed all of the actual tools and software that we’ll need to build our network automation pipeline in our lab environment, let’s pick this up in part 3, where we actually get to building our repository inside of GitLab, creating our lab in Containerlab, and configuring our CI/CD pipeline to work some magic on the configurations in our network! Get hyped!
The part 3 link is: ha got em, haven’t made it yet, will update this when it’s out